

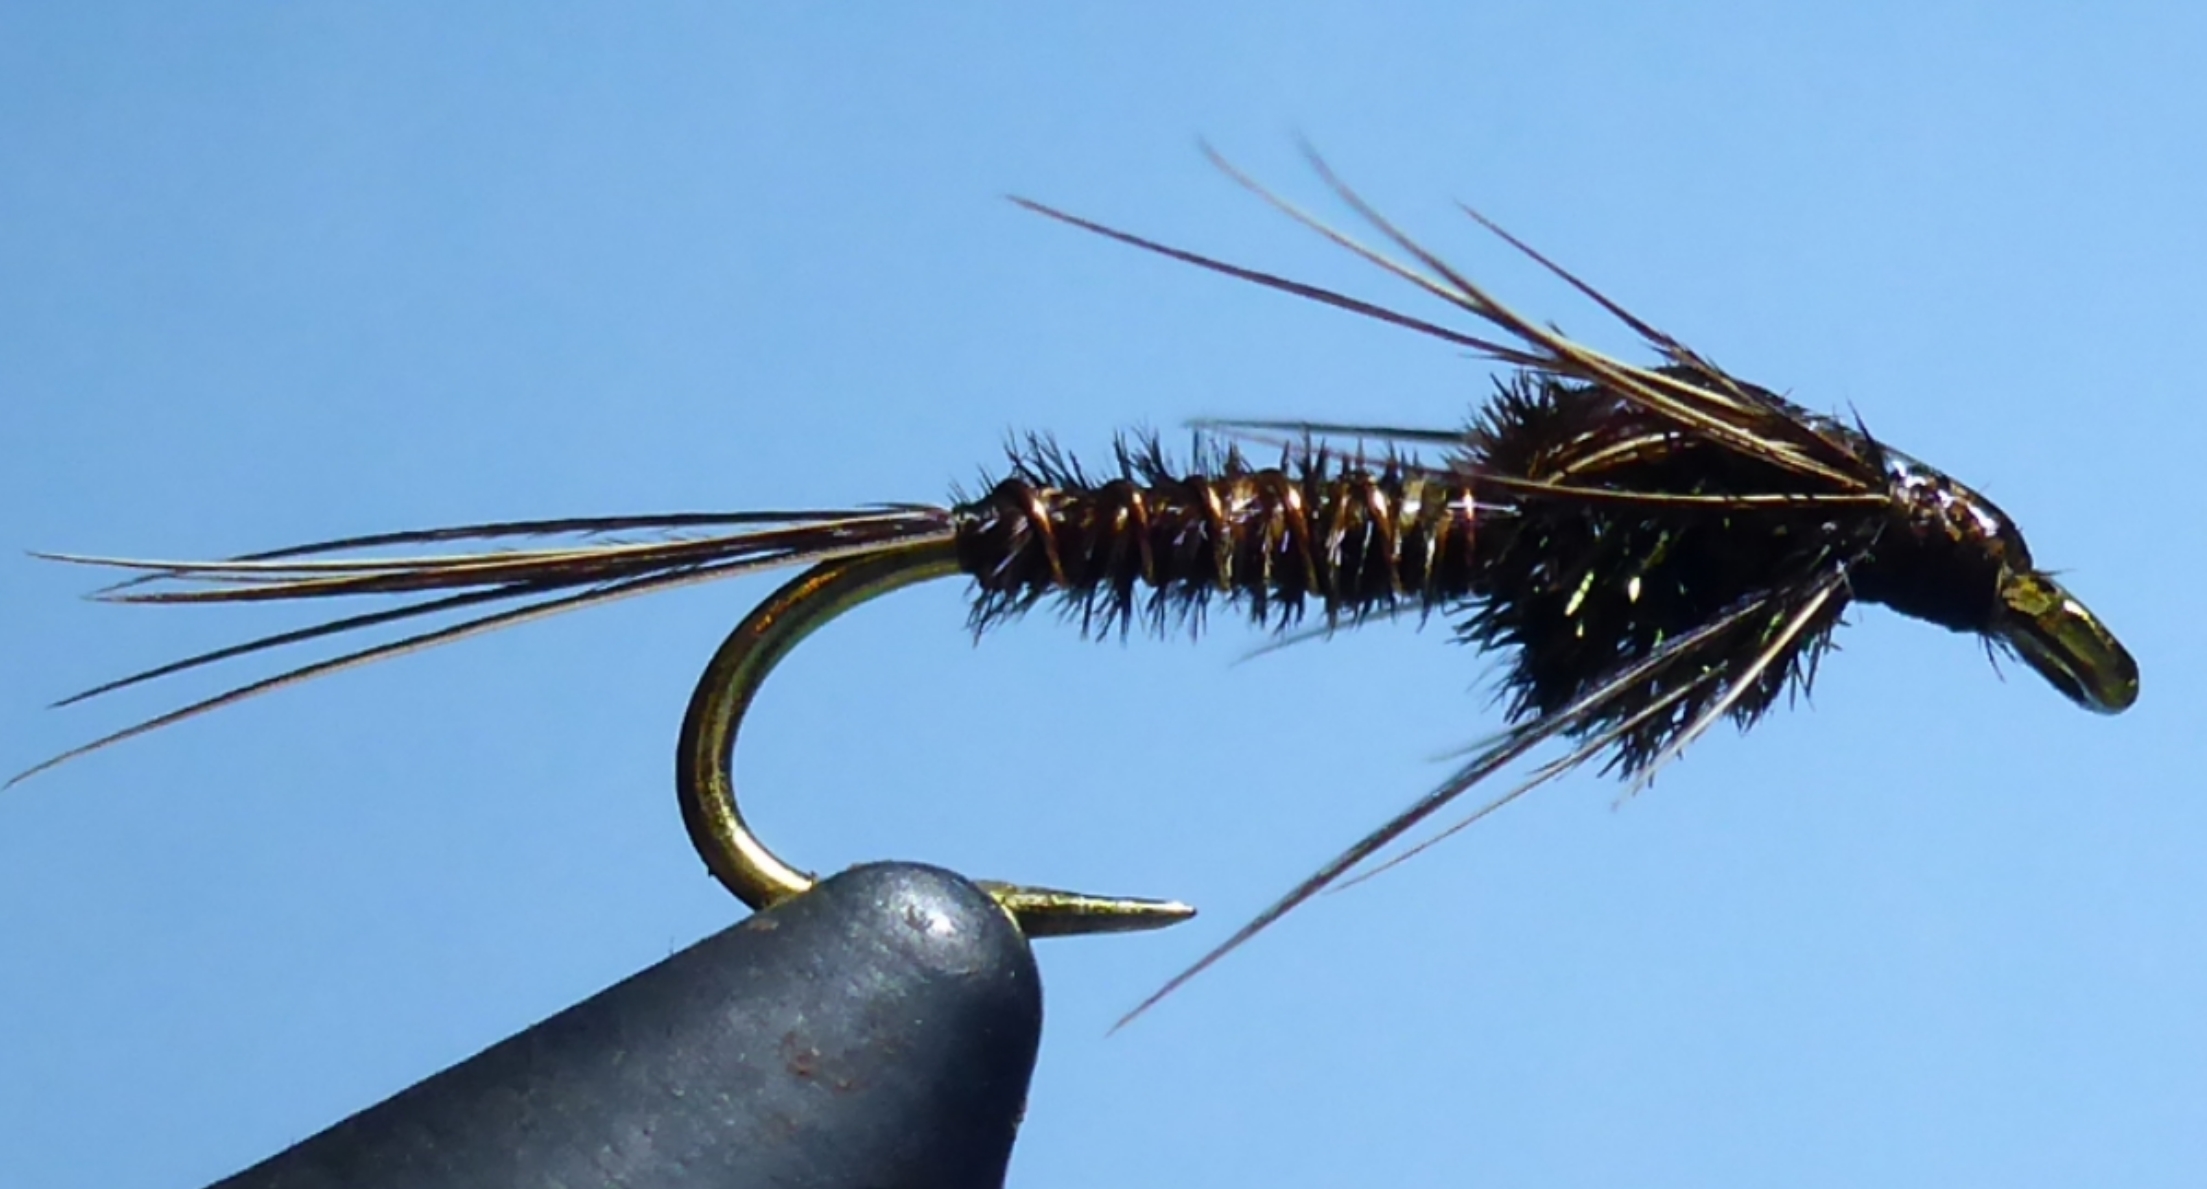
Of all the patterns I tie on a regular basis and of all the “go to” patterns that I find myself using, this is the one that comes up more often than any other. The start of winter always heralds a day or two of solid Pheasant Tail Nymph tying to see me through the following year’s fishing. So, although this may not be the most exciting, nor the most technically advanced pattern to tie, it is one that anyone tying their own flies needs to know how to tie. The Pheasant Tail Nymph, or PT as it is often referred to, is a quick tie with only a few materials, but it delivers results in both streams and lakes, making it an invaluable addition to your fly box.
For the purposes of this demonstration, I have tied this on a size 12 Kamasan B170 standard nymph hook, but these work well in a range of sizes and with similar hooks. This pattern can also be tied with a bead head for added weight when you want your nymph to get down in the water faster, but this time around I have shown how to tie an unweighted version which can be effectively fished in a wider range of situations.
I always start by mashing the barb of my hook within the jaws of the vice. I decided some time ago that if I was going to practice a catch and release policy, I really shouldn’t be ripping the fishing jaw apart trying to remove barbed hooks that get caught on cartilage. It is good to get into the habit of doing this as the first step in the process as there is nothing more annoying than spending the time preparing a pattern and then accidentally snapping the hook point off after all the work has been put in.

Next, I get a thread started on the hook about 2-3mm back from the beginning of the eye. For this pattern I am using 70 denier UTC Ultra Thread in Dark Brown. You can get away with using any brown, black or even an olive or red colour though. The thread mostly doesn’t show in the final result except at the end of the head. I do like to use a red thread when tying weighted nymphs so they are easily distinguished when inn my fly box.

The first component I add is a length of UTC Copper Wire in a small size. This will form the rib of the fly and give the body strength as it will hold the pheasant tail firmly down to the hook shank. From about half way along the hook shank, I tie in the wire and extending back to where the bend begins in the hook, adding a couple of loops of thread behind the wire at the very back end.

After this, I take about five or six long fibres from a ringneck pheasant tail. It’s important to use feathers that are of a decent length for this. Get feathers that are more than 12 inches long, as the larger feathers have a courser texture on the fibres and give the body more definition. Leaving about a third of the hook’s length extending beyond the bend, this will form the tail of the nymph. With a few wraps of the thread around the feather fibres, continue the thread up the hook shank about two thirds of the way along.

Now, take these fibres all together and begin to wind them around the hook shank and continue up until you meet your thread. Once there, you can tie the fibres off with a few wraps of the thread and clip the excess off. I find it is best to wind the feathers on by hand and not get tempted to use hackle pliers as these tend to snap the feathers and you end up with the body unravelling as you are trying to tie it off.
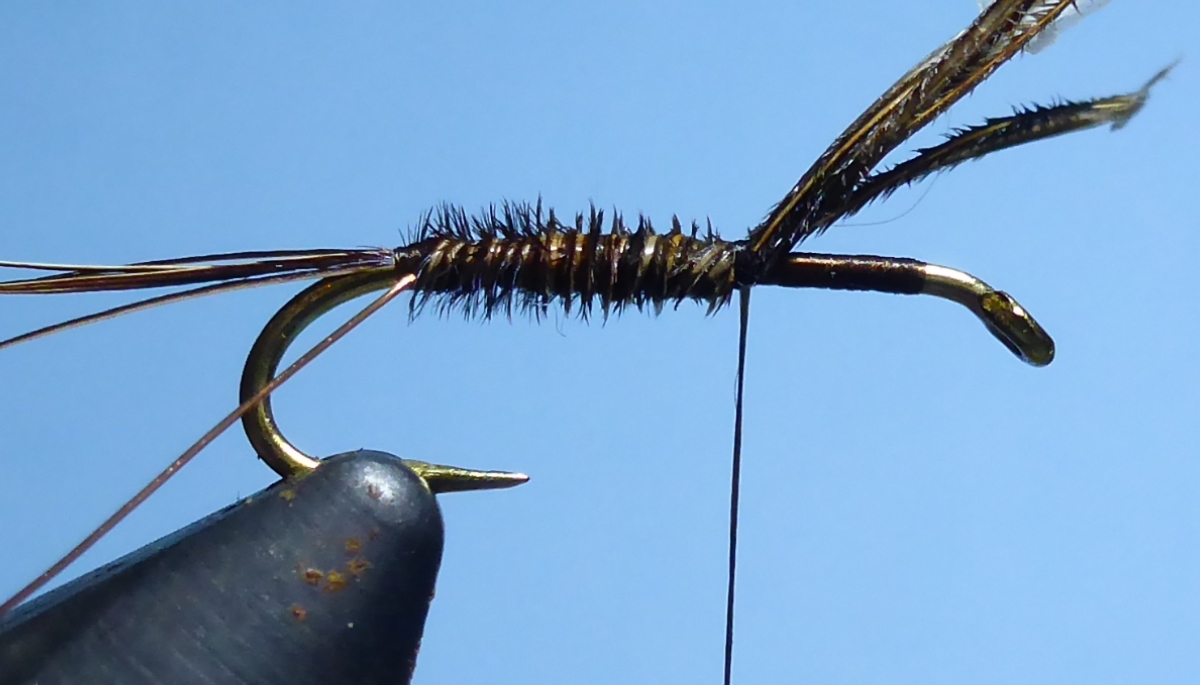
To secure the pheasant tail fibres to the body, I now take the copper wire and wind that up the length of the hook shank in the opposite direction to how the feather fibres were wound on. This secures the fibres in place so they won’t unravel with heavy use and also gives the body of the fly a ribbed look that catches the light when under water.

The next step is to select about ten pheasant tail fibres and align the tips of them, as opposed to the base as they sit on the vane. With the tips aligned, they need to be tied in where you previous fibres ended. The important part of this step is getting the length right. With the tips of fibres extended back to the end of the tail, you will have the right length to work with to create not only a wing case but legs as well in the final stages.

After this, select two good pieces of peacock hurl with a bushy texture and trim off the first inch or so to remove any brittle sections of the fibres. Tie these in at the same point as the pheasant tail, ensuring the fibres of the hurl are facing up and out when they will be wound onto the hook shank. In this, extend the thread forward and trim off any excess peacock hurl that isn’t needed.

Taking both strands of peacock hurl together, simply wind them around the hook shank to develop a bushy thorax section. I usually run them backwards and forwards to build this up before ending up near the eye of the hook where a few wraps of the thread is enough to tie it off and the excess is trimmed as close as possible.

To create the wing casing, the pheasant tail fibres that were previously tied in are now pulled forward, over the thorax and tied off just before the eye of the hook. In doing so, try to get the fibres to lay evenly side by side, giving the look of a flat section of fibres, much like how they appear when on the vane. This will help the wing case stand out and promote the peacock fibres down into the thorax.

With the pheasant tail fibres tied down securely, use your thumb to push the tips of them back towards the tail. As you wiggle your thumb around on top of the pattern, they should separate into two groups, one either side of the wing case. An extra few wraps of the thread moving it back towards the tail slightly will hold these fibres down and so create the legs of the nymph.

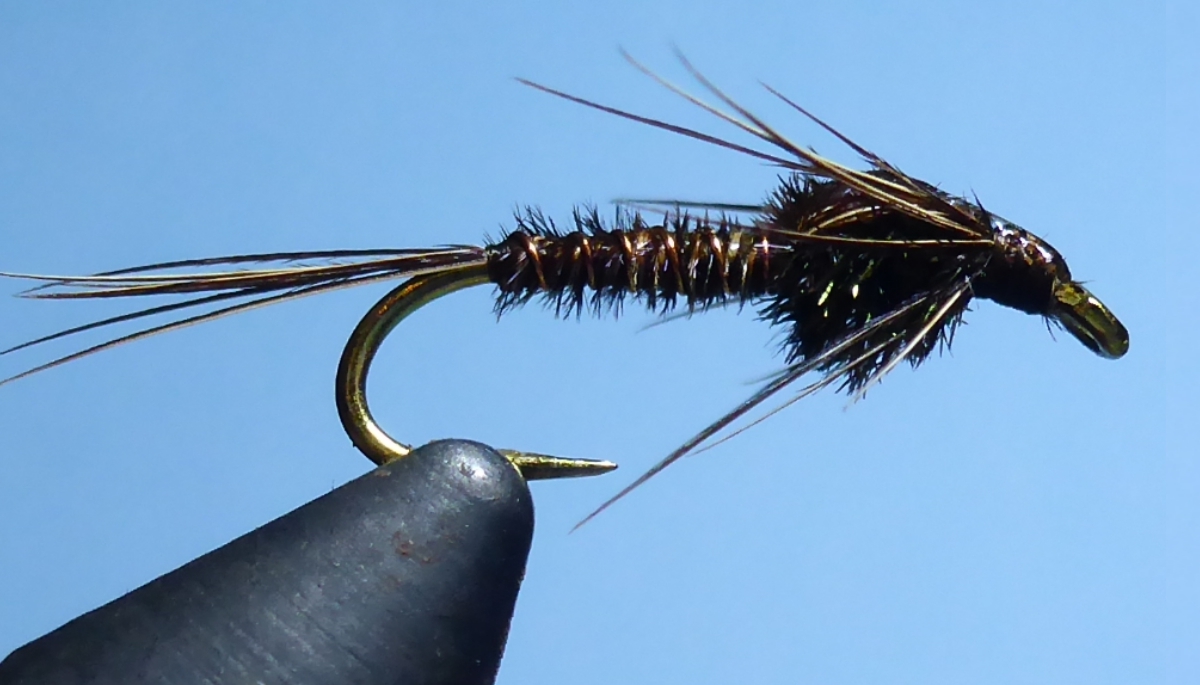
The final stage is to tie a half hitch in the thread to secure it. Then you can trim any excess materials and tidy the pattern up before a four or five turn whip finish to properly secure the thread in place. I always add a small amount of head cement at this stage to keep the thread from coming lose. I usually extend the head cement back over the wing casing for additional strength and a sharp, glossy look. All that is left to do now is repeat the process a dozen times or so and then go and fish with them.
You can find the materials needed for this pattern in the Troutlore store. Links for these are all provided below.
MATERIALS USED:
• Kamasan B170 Nymph Hook
• UTC Ultra Thread – Dark Brown
• UTC Copper Wire
• Ringneck Pheasant Tail
• Peacock Hurl
• Loon Hard Head Cement


Leave A Comment
You must be logged in to post a comment.